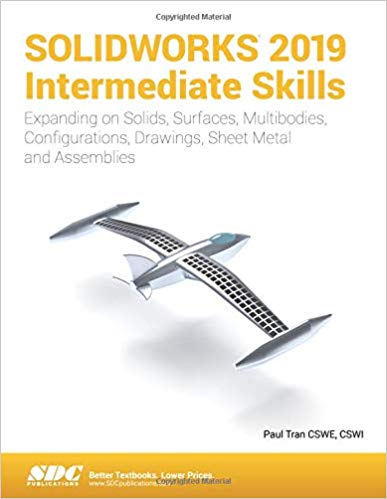
SOLIDWORKS 2019 Intermediate Skills (4th edition) - Image pdf with ocr

دانلود کتاب SOLIDWORKS 2019 Intermediate Skills (4th edition) - Image pdf with ocr

Author: Paul Tran

0 (0)

توضیحات کتاب :

SOLIDWORKS 2019 Intermediate Skills is part of a three part series which builds on the SOLIDWORKS features learned in SOLIDWORKS 2019 Basic Tools

سرچ در وردکت | سرچ در گودریدز | سرچ در اب بوکز | سرچ در آمازون | سرچ در گوگل بوک

1,404 بازدید 2 خرید

ضمانت بازگشت

ضمانت بازگشت

فایل های تست شده

فایل های تست شده

پرداخت آنلاین

پرداخت آنلاین

تضمین کیفیت

تضمین کیفیت

دانلود فوری

دانلود فوری

SOLIDWORKS 2019 Intermediate Skills is part of a three part series which builds on the SOLIDWORKS features learned in SOLIDWORKS 2019 Basic Tools. SOLIDWORKS 2019 Intermediate Skills broadens your SOLIDWORKS knowledge base by covering such features as surveys, lofts and boundaries, the use of multibodies, generating engineering drawings and other SOLIDWORKS functions that are critical for the effective use of this powerful software.

This book helps prepare you for the advanced features of SOLIDWORKS which are covered in SOLIDWORKS Advanced Techniques. It uses a step by step tutorial approach with real world projects. This book also features a Quick-Reference-Guide to the SOLIDWORKS 2019 commands, icons, and customized hotkeys.

Table of Contents

Introduction: SOLIDWORKS User Interface
1. Document Properties
2. Sketching
3. Creating Multibody Parts
4. Working with Multibody Parts
5. Revolved & Thread Features
6. Flex Bending
7. Sweep with Guide Curves
8. Lofts and Boundaries
9. Surfaces and Patches
10. Configuration Features
11. Assembly Motions and Mates
12. Using Smart Mates
13. Top Down Assembly
14. Using the Lip and Groove Options
15. Assembly Drawings and BOMs
16. Drawings and Detailing
17. SOLIDWORKS MBD
18. Sheet Metal Parts
19. Smart Components
20. Using Subtract & Intersect
21. Using Magnetic Mates
22. Hybrid Modeling
Glossary
Index
SOLIDWORKS 2019 Quick-Guides

چکیده فارسی

SOLIDWORKS 2019 Intermediate Skills بخشی از یک سری سه قسمتی است که بر اساس ویژگی های SOLIDWORKS آموخته شده در SOLIDWORKS 2019 Basic Tools ساخته شده است. SOLIDWORKS 2019 Intermediate Skills پایگاه دانش SOLIDWORKS شما را با پوشش دادن ویژگی‌هایی مانند بررسی‌ها، سقف‌ها و مرزها، استفاده از چند بدنه، ایجاد نقشه‌های مهندسی و سایر عملکردهای SOLIDWORKS که برای استفاده مؤثر از این نرم‌افزار قدرتمند حیاتی هستند، گسترش می‌دهد.

این کتاب به شما کمک می کند تا برای ویژگی های پیشرفته SOLIDWORKS که در تکنیک های پیشرفته SOLIDWORKS پوشش داده شده است، آماده شوید. از روش آموزش گام به گام با پروژه های دنیای واقعی استفاده می کند. این کتاب همچنین دارای یک راهنمای مرجع سریع برای دستورات، نمادها و کلیدهای فوری سفارشی SOLIDWORKS 2019 است.

فهرست محتوا

مقدمه: رابط کاربری SOLIDWORKS
1. ویژگی های سند
2. طراحی
3. ایجاد قطعات چند بدنه
4. کار با قطعات چند بدنه
5. ویژگی های چرخشی و موضوعی
6. خمش انعطاف پذیر
7. جارو با منحنی های راهنما
8. انبارها و مرزها
9. سطوح و وصله ها
10. ویژگی های پیکربندی
11. مونتاژ حرکت و جفت
12. استفاده از Smart Mates
13. مجمع از بالا به پایین
14. استفاده از گزینه های Lip and Groove
15. نقشه های مونتاژ و BOM ها
16. نقشه ها و جزئیات
17. SOLIDWORKS MBD
18. قطعات ورق فلزی
19. اجزای هوشمند
20. استفاده از Subtract & Intersect
21. استفاده از Magnetic Mates
22. مدلسازی ترکیبی
واژه نامه
شاخص
SOLIDWORKS 2019 Quick-Guides

ادامه ...

Ebook details:
عنوان: SOLIDWORKS 2019 Intermediate Skills
نویسنده: Paul Tran
ناشر: SDC Publications (December 3, 2018)
زبان: English
شابک: 1630572365, 978-1630572365
حجم: 142 Mb
فرمت: Image pdf with ocr

ادامه ...

Title Page Copyright Acknowledgments Foreword Table of Contents Introduction: SOLIDWORKS 2019 User Interface The 3 reference planes The Toolbars The System Feedback symbols The Status Bar 2D Sketch examples 3D Feature examples Chapter 1: Document Properties Setting up the Document Template Different Standards in the World Starting a new part document Setting the ANSI drafting standards Setting the dimension options Setting the Virtual Sharp options Setting the Units options Setting the Image Quality options Saving the settings as a Part Template Customizing Keyboard Shortcuts Customizing Tool Buttons Chapter 2: Sketching Handle Tools Needed Starting a new part document Changing the System Options Creating the Parent sketch Revolving the parent sketch Adding the tip detail Revolving the sketch Transitioning from Line-to-Arc Mirroring in sketch mode Adding dimensions Extruding a cut Creating a Circular Pattern Adding other cut features Creating another Circular Pattern Adding a Constant Size Fillet Assigning material to the model Calculating the Mass of the model Saving your work Working with Sketch Pictures Re-using the Geometry Chapter 3: Creating Multibody Parts Wooden Crate Tools Needed Starting a new part document Sketching the first body profile Extruding the first body Copying the body Creating the upper plank Creating the first linear pattern Mirroring the planks Creating the lower plank Creating the second linear pattern Creating an exploded view Collapsing the view Saving your work Exercise: Combining Multibodies Chapter 4: Working with Multibody Parts Creating Mates & Exploded Views Tools Needed Opening a part document Creating an exploded view Collapsing the solid bodies Inserting another part Constraining the solid bodies Adding a Concentric mate Adding a Coincident mate Creating a new mirror plane Creating a mirror body Inserting another part Adding a Concentric mate Adding a Coincident mate Adding another instance of the bolt Adding a Concentric mate Adding a Coincident mate Editing the exploded view Saving your work Working with MultiBodies Chapter 5: Revolved & Thread Features Cylinder Tools Needed Opening a part document Creating a revolved feature Adding chamfers Creating the mounting holes Adding threads Adding threads to the opposite end Creating a Zonal Section View Saving your work Exercise: Revolved & Threads Chapter 6: Flex Bending Spanner Tools Needed Flex Bending – Part 1 Opening a part document Creating the first Flex-Bending feature Creating the second Flex-Bending feature Flex examples Flex Twisting Flex Stretching Flex Tapering Flex Bending Flex Bending – Part 2 Opening a part document Creating a Flex-Bending Creating a Linear Pattern Using the Deform feature Opening a part document Creating a Curve-to-Curve deform Save and close Opening a part document Creating a Curve to Curve deform Mirroring a surface body Save and close all documents Chapter 7: Sweep with Guide Curves Plastic Bottle Tools Needed Opening a part document Creating the main body Creating the first split line Creating a Face Fillet Creating the second split line Creating the first offset surface Creating a ruled surface Creating the first knit surface Adding the first fillet Making the first cut-with-surface Creating the first offset surface Creating the second offset surface Creating the second knit surface Adding the second fillet: Making the second cut-with-surface Adding the third fillet Creating a shell Adding the neck feature Revolving the sketch Creating a new plane Creating a helix Sketching the thread profile Making the Threads Rounding off the ends of the threads Revolving the sketch Rounding off the opposite Side Sweep with Solid Body Exercise: Sweep vs. Loft Chapter 8: Lofts and Boundaries Solar Boat Tools Needed Opening a part document Creating a lofted feature Creating the boundary feature Creating the wing Creating the wing-support Constructing the nose feature Creating the horizontal tail fins Creating the vertical tail fin Creating a split line Creating the canopy’s first profile Creating a new plane Sketching the guide curve Creating the canopy’s second loft profile Creating the canopy’s 3rd loft profile Creating the canopy Creating a mirror feature Adding fillets to the main body Adding fillets to the float and wing Adding fillets to the ends of the floats Adding fillets to the tail fins Adding fillets to the ends of the fins Creating a face fillet Creating a split line for the solar panels Changing the color of the solar squares Changing the edge display Exercise: Surface & Solid Modeling Chapter 9: Surfaces and Patches Welding Fixture Tools Needed Opening a part document Creating a swept surface Creating the first extruded surface Creating the second extruded surface Creating the third extruded surface Creating the first trimmed surface Creating the second trimmed surface Creating the third trimmed surface Creating a lofted surface Creating the first boundary surface Creating the second boundary surface Creating the first filled surface Creating the second filled surface Creating a face fillet Knitting all surfaces Thickening the surface model Creating a section view Changing the edge display Exercise: Surface Modifications Chapter 10: Configure Features Wooden Crate Tools Needed Opening a part document Configuring features Saving the table Adding new configurations Viewing the new configuration Adding more configurations Renaming a configuration Inserting a design table Adding a Material column Exercise: Design Tables & Tabulated Tables Chapter 11: Assembly Motions & Mates HeliDrone Tools Needed Opening an existing assembly document Using the Width mate Adding a Concentric mate Adding another Concentric mate Testing the assembly motions Adding a Limit-Angle mate Adding a Parallel mate Adding a Gear mate Testing the assembly motions Radial Explode Opening an existing assembly Creating the first Pattern Driven Creating the second Pattern Driven Creating the first radial exploded view Creating the second radial exploded view Changing to the Configuration tree Verifying the exploded view Exercise: Assembly Motions Chapter 12: Using Smart-Mates Fixture Assembly Tools Needed Opening an existing assembly document Enabling the Selection options Exploring the Smart-Mate options Using Smart-Mate Concentric Creating a Smart-Mate Concentric & Coincident Repeating the previous Mate Mating other components Checking the status of the components Switching Configuration Creating an instance of the bolt Creating another instance of the bolt Adding more bolts Repeating Mate Controller Using Copy with Mates Chapter 13: Top Down Assembly Car Remote Control Housing Tools Needed Opening a part document Making an assembly from part Placing the first component Creating a new part Converting the entities Extruding the sketch Adding the fillet Shelling the part Hiding a component Adding features to the part Creating offset entities Extruding the sketch Adding the fillet Showing a component Creating a section view Applying dimension changes Creating an exploded view Playing the animation Changing the display mode Creating a Flat Spring Assembly Exercise: Spring Assembly Chapter 14: Using the Lip & Groove Options Lesson Overview Tools Needed Top Down Assembly Opening the existing assembly Editing the Housing Creating a section view Using the Mounting Boss Option Opening the existing assembly Editing Part Setting the Parameters Adding two more mounting bosses Toggling between the Explode and the Collapse views Creating the Mating Bosses Creating a Section View Repeating Chapter 15: Assembly Drawings & BOM Aluminum Enclosure Tools Needed Starting a new drawing document Selecting the ANSI standard sheet size Switching to ANSI standards Using the View Palette Inserting a Bill of Materials Modifying the BOM’s Row Height Adding a new column Customizing the new column Changing the color of the paper Adding balloons Adding an isometric view Changing the display of a drawing view Editing the Sheet Format Switching back to the Sheet Reference Reading: GD&T Form Examples Orientation Examples Profile Examples Runout Examples Location Examples ASME - Y14.5 Symbol Descriptions Feature Control Frames MMC maximum material condition LMC least material condition Chapter 16: Drawings & Detailing Drawings & Detailing - Part 1 Front Cover Plate Tools Needed Opening a part document Creating the drawing views Changing to Phantom line style Creating a Partial Section view Flipping the section direction Changing the hatch pattern Creating a Detail view Inserting the model dimensions Cleaning up the dimensions Inserting dimensions to another view Breaking the view alignment Creating a Projected View Adding the Centerline Symbol Adding Datums Adding a Flatness tolerance Copying the control frame Modifying the geometric tolerance Adding another Position tolerance Adding a Symmetric tolerance Adding a Bilateral tolerance Adding a Limit tolerance Adding a Basic tolerance Adding General Notes Filling out the Title Block Exercise: Creating a drawing from a model Exercise: Attaching a note or symbol to a dimension Drawings & Detailing - Part 2 Mounting Bracket Tools Needed Opening a part document Making drawing from part Using the View Palette Changing the Line Style Creating a Section View Modifying the cross hatch properties Adding a Detail View Modifying the Section Line Style Inserting the Model Dimensions Arranging dimension handles Adding the number of instances Using the Hole Callout Adding reference dimensions Adding Centerlines Adding Center Marks Modifying the hole callout Modifying the instances Adding Datum Features Adding Geometric Tolerances Adding Flag Notes Adding General Notes Filling out the Title Block Chapter 17: SOLIDWORKS MBD Introduction Model Based Definition Tools Needed Prismatic Parts Opening a part document Enabling SOLIDWORKS MBD Setting the options Adding datums Using Scope Showing the constraint status Adding the size dimensions Showing the Tolerance Status Exercise: Adding the Size and Location Dimensions Turned Parts Capturing 3D Views Publishing PDF and eDrawing Files 3D PDF Template Editor Chapter 18: Sheet Metal Parts Hard Drive Enclosure Tools Needed Starting a new part document Creating the Base Flange Creating a cut feature Creating the first Edge Flange Creating the second Edge Flange Copying and Pasting a sketch Creating more cuts Adding a Library Feature Cut Mirroring a Feature Toggling the Flat Display Creating the Flat Pattern Accessing the Sheet Properties Multibody Sheet Metal Parts Using FeatureWorks - Feature Recognition Chapter 19: Smart Component Auto Size & Configurator Table Tools Needed Opening a part document Showing the dimensions and their names Splitting the FeatureManager tree Adding a new configuration Creating mate references Testing the mate references Making a smart component Testing the smart component Adding other instances of the cap Chapter 20: Using Subtract & Intersect Simple Cavity Tools Needed Opening a part document Scaling the part Extruding the mold block Assigning material Copying a solid body Creating the cavity Separating the solid bodies Using the Intersect tool Exercise: Creating a Cavity with Combine Subtract Chapter 21: Using Magnetic Mates Deck Assembly Tools Needed Opening a part document Publishing an Asset Opening another part document Defining another Asset Publisher Opening an assembly document Adding the Section1 component to the assembly Adding another instance of Section1 Adding more instances Chapter 22: Hybrid Modeling Remote Control Tools Needed Opening a part document Extruding the first surface Extruding the second surface Trimming the surfaces Thickening the surfaces Creating a split line feature Adding draft Adding fillets Shelling the solid body Cutting the solid body Saving the upper half Saving the lower half Flipping the cut direction Inserting the top half Creating the cut for the keypad Separating the two halves Changing appearance Glossary Index SOLIDWORKS 2019 Quick Guide

ادامه ...
برای ارسال نظر لطفا وارد شوید یا ثبت نام کنید
ادامه ...
پشتیبانی محصول

۱- در صورت داشتن هرگونه مشکلی در پرداخت، لطفا با پشتیبانی تلگرام در ارتباط باشید.

۲- برای خرید محصولات لطفا به شماره محصول و عنوان دقت کنید.

۳- شما می توانید فایلها را روی نرم افزارهای مختلف اجرا کنید(هیچگونه کد یا قفلی روی فایلها وجود ندارد).

۴- بعد از خرید، محصول مورد نظر از صفحه محصول قابل دانلود خواهد بود همچنین به ایمیل شما ارسال می شود.

۵- در صورت وجود هر مشکلی در فرایند خرید با تماس بگیرید.